Sunday Best Sampler Finishing Instructions

Sunday Best Sampler Quilt
Today is the last day of our Sunday Best Quilts Sampler sew along and we are sharing the finishing instructions for the quilt.
It has been such a treat seeing all of your blocks (and some of you went ahead and have all ready finished your quilt tops!)
For my quilt, I added the sashing but no border. Sherri opted to add a border to her quilt so be sure to stop by her blog to see her finished quilt.

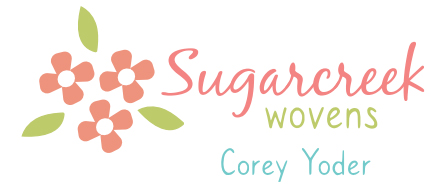
Sunday Best Sampler in Sugarcreek
You will find the instructions for finishing your quilt with or without a border here:
Sunday Best Finishing Instructions
One tip I have as you are laying out your quilt to start sewing the blocks together…I would recommend you adjust placement of the blocks as needed. Sherri and my blocks are in a different order as we placed them throughout our quilts based on the best placement of the blocks.
You might find that some of your blocks feel a little bit “heavier” and you will want to spread those around your quilt top. Or if you have similar fabrics in more than one block you might like to distance those from each other a little bit. So certainly, feel free to play around with block placement!

Frances the kitty on my Blockheads 2 quilt
And, isn’t it fun that as we are finishing one sew along, a new one will be starting up in just a few short weeks! If you missed my announcement on Monday about Block Heads Round 3, be sure to check it out.
Thank you, thank you to all that have sewn along with Sherri and I’s Sunday Best Quilts Sampler along! It has been a real treat!


I have enjoyed sewing along on the Sunday Best Quilts Sampler! Thanks for offering this. Can’t wait to put all the blocks together and finish the quilt! Looking forward to Block Heads Round 3!
Thanks for this fun sew-along. I still need to make my Nantucket block but hopefully I have my quilt top together before the end of the year.
There is an error in the finishing instructions. The illustration for the 9 patches, Figure 4, the corner squares should be PRINT, not BG. Ask me how I know…. 😉
Oh thank you for pointing that out Ramona!–I’ve updated the PDF to reflect that needed change. I’m so glad that is an easy fix and it’s just an illustration error–the written instructions in that step are accurate. Thank you so much for letting me know so I could get that changed!
Hi .. you all are done and I just finished block 6 … ugh !!! but I am going to finish … I am still going strong … just my Pup Sophie hates it when I sit down at the sewing machine for some reason… but I am heading back to my sewing room starting bock 7 … thanks for the fun sew along .. this was my first online group sew along and it was a lot of fun thank you. … plus I will have a beautiful quilt when I am done .. and yes it will be mine .. all mine. .. 🙂 … Kim
Kim I just finished block six forever ago and got busy with christmas so now I’m fixing to get back to it as well!
I need court house steps directions from the blog to make it finish 18 1/2 inches, can you please help me.
Dolores